Friday, 30 November 2012

JP: Editing Updates

Below are several printscreens illustrating how we have progressed during post-production.

This screenshot shows how I used the motion tool on Adobe Premiere Elements 9 to align our clip and size it correctly in order for there to be a seemless change for our ending.


I cut the same clip up into 3 sections and used the time stretch tool to speed all 3 up at varying speeds and overlayed them on top of each other using different tracks and altering the opacity tool. I then used the fast blur tool to slighly blur the clips to give the effect that the boy was posessed or devil-like.


Below is a screenshot showing our timeline so far and how we have begun to overlay clips using fading transitions and altering the opacity.


I used the motion tool on this clip to stabilise it and frame it better and track the boy skipping.


I have began to use the RGB colour correction and the HLS tool to desaturate the clip to make it more cinematic.


Simliarly I used the HLS tool on the footage of the flames to slightly desaturate them again giving a more cinematic, professional feel and tone.


Wednesday, 28 November 2012

HCT: Spare Clips

We have a number of clips that are unorganised, sitting to the right of our timeline. We need to organise these clips as it is clogging up the process and is confusing when trying to find clips and sorting the usefull from the useless. This print screen shows these spare clips, as you can see it is hard to see what each clip is when un-rendered and when they are this small.

HCT: Editing Update

Today this is what our timeline is looking like. I have ordered our clips into a more systematic arrangement so that we have a rough cut to go by. The result means we have found areas that need to be improved and others that are ok. There is still a lot that needs to be done before completion although we are getting there.
The following things I have seen that need to be altered:
  • Good relationship between the last two shots and matching.
  • Colour grade the entire video.
  • Patch up some of the areas where lip syncing is not good.
  • Reduce the amount of shots of just fire.
  • Double check cutting rate and timing of cuts throughout.
  • Show rough cut to the class to get feedback on the whole video.
  • Apply vignette where needed.


Monday, 26 November 2012

JP: Editing Update

During the last few lessons and today's lesson I have imported various steadicam shots of the children playing to the timeline and shots of the flames to intercut the main meat shot.

One thing I have particularly done is overlayed footage using the opacity tool which is shown in the screenshot below. This looks more cinematic and professional.

Tuesday, 20 November 2012

JP: Digipak Construction

Whilst constructing the Digipak for our album, I screenshotted my various steps in order to obtain evidence and talk about the techniques I used in the process of creation.

1) File > Place. I imported the pictures and used the line tool to align the boy on both front and back cover, however after aligning the back cover correctly there was missing space below the photo.


2) Image > Adjustments > Black & White. I edited the colouring of the photos to turn them into black and white, and then cropped them. I then created brush presets using (Edit > Define Brush Preset) to look like paint splatters and added a few splats of colour on the edges of the pictures. I then used the clone stamp tool to fill in the negative space by copying areas of the concrete and pasting them.


3) Image > Adjustments > Curves. I used the curves tool to adjust the tone and contrast of the photo to make it look more vibrant and professional.


4) Gradient. By applying a gradient with black and transparent colour I created a vignette over both covers. This emphasised the subject more and made it look professional. I adjusted the opacity and changed the effect to 'overlay' in order to make the vignette more subtle.


5) File > Place. I placed the photo that would be positioned behind the CD (top left) and cropped it to size and rotated it so that when printed out it would be in the right position.


6) Using the brush presets of paint splatters I had already created I applied neon coloured paint splatters to the image to link in with the front and back covers.


7) File > Place. I placed the inside cover photo (top right) and cropped it to size and rotated it too. I then imported a picture of the up in flames logo and removed the background and positioned it over the top of the photo.


8) Image > Adjustments > Black & White. I used the black and white tool to make the photo duo-toned again and then altered the logo to create a mask where the colour would shine through. However I decided to remove this as I didn't like it or think it looked professional/commercial.


9) Shape tool. I used the shape tool to draw two opaque yellow rectangles to represent the double stripe Chris Martin (the lead singer of Coldplay draws on his hand).


10) Using the overlay effect I made the shapes translucent and lowered the opacity slightly too.


11) Text. I added a new text layer using the 'Every Truetype is a Wisefont' typeface to create the text for the spine of the CD cover to say 'COLDPLAY' 'UP IN FLAMES'.


12) Clone Stamp. I used the clone stamp tool to select areas of the hoodie and paint-paste them to remove the GAP logo.


13) A screenshot of the final photo with the logo removed.


14) A screenshot of the digipak so far.


14) Text. I created a new text layer to say 'COLDPLAY PRESENT UP IN FLAMES' in the 'Every Truetype is a Wisefont' font. Magic Wand > Select Text > Delete. Right Click > Select Inverse > Brush tool to paint white over. This created a cut-out effect. However I found this quite basic and so undid it.


15) Text. I created a new text layer to simply say 'UP IN FLAMES' in white in the Coldplay font and positioned it in the top section on the front cover.


16) Image > Adjustments > Hue/Saturation. I edited the hue of the image behind the CD (top left) to a bright vibrant pink colour to match the neon feel.


17) Filter > Blur > Gaussian Blur. I used the gaussian blur tool to slightly blur the paint splatters behind the CD and around the edges of the front and back covers. This created more of a colour-seeping-in effect as opposed to actual paint splats which I strongly believe looks much more professional.


18) Inner Shadow. I changed the opacity of the cover text and the spine text so it was more overlayed and added an inner shadow to both. This made the text stand out more and make it look more professional.


19) Text. I placed the Parlophone Records logo and created a new text layer to include a copyright phrase to conform to conventions.


FINAL DIGIPAK SCREEN SHOT (BELOW)

Monday, 19 November 2012

Group: Editing development

Today we have put the long 'meat' shot into our timeline. This is of our actor - Seth - lip syncing the lyrics whilst the other children play in the background. We downloaded the song 'Up In Flames' and slowed down the video by 50% before syncronising the two. The print screen below shows what we have so far. An issue that we have come across is that in the main video we are using, Seth is late on lip syncing the first line of the song. We are trying to find alternative clips of him getting this section correct as we took several takes on set. This is proving to be very hard and might be a big issue.

UPDATE: We have overcome this solution using a fade in from black transition.


Group: Editing Update

We have started to edit the animated ring that will turn into the coldplay text on Adobe After Effects CS5.5. Joe used masks and keyframes to achieve the reveal effect we were aiming for. Here are some screen shots to show the progression so far of the animation aspect of the video.


Group: Editing Progression

In the past week we started to edit our footage. We began to place our raw shots into the premiere elements timeline and started getting a rough idea of what we had to play with. At the end of the lesson we finished up with a few titles in and some of the time lapse shots. Here is a print screen to show our progresssion.

Wednesday, 7 November 2012

Group: Production Diary during Filming

FIRST SHOOT
Sunday 28th October

Today was our first film shoot. It started at 5:30am because we wanted to make sure we managed to capture footage of the sun rising in Wateringbury, one of our main rural locations for the 30 seconds of visual. At this location, Henry and I set up the tripod with the camera and framed the shot correctly so that we would capture the sun rising and also the clouds in the sky moving, as we knew we wanted to make a time lapse of this establishing shot.

We then captured some other footage including a jeep with the sun in the background, and two horses standing side by side in a field with their breath being highlighted by the natural light of the sun.

After this, we travelled to Pelagic Aquatics, a small shop in the countryside and walked to our next location. Here we set up the track and dolly on top of a wooden crate so that we could get a steady tracking shot without the bumpiness of the mud and grass. We shot a steady track along a wooden gate and gradually focussed into the surrounding rural location.


Our next key establishing shot was taken at a vantage point in the countryside. We changed the lens to a wide-angle lens so that we could capture a panoramic shot of the location. After shooting this, we travelled back to Henry's house in order to shoot several conceptual artistic shots.


At Henry's house we set up the smoke machine that we had hired, a wooden crate, and a toy elephant on top. We positioned the tripod correctly in order to capture the elephant being set alight. We took great care when filming this fire shot so that we were safe and not in danger of getting burnt. Henry stood far away and threw the match whilst I slowly pressed the button on the smoke machine in order to get a thin layer of atmosphere. This is a key shot in our music video as when slowed down the flames will flicker and link into our concept of the boy's childhood going 'up in flames'.


Afterwards, we shot the footage of the lightbulbs smashing, and attempted to film shots of sparklers spinning in the air. However this proved difficult as the sparklers just fell straight to the ground. Both Henry and I made a joint decision not to include the sparkler footage in our video.


As the day got later, we decided to aim to use the rest of the daylight to film at Potters Manor House - an abandoned manor house surrounded by some woods in Crowborough - a location that I had found. However, it took longer than planned to find the house and by the time we reached the location we both decided that it was too dark to film as there would be no natural light. We decided to come back the following morning.

In the evening we travelled into the town to shoot some interesting locations for the few seconds of green screen where the background seemlessly changes.


SECOND SHOOT
Monday 29th October

Another early start for us both meant that we were able to travel to Potters Manor House while the sun gave us natural light to film. We walked through the woods and up to the abandoned house, hidden from public view due to the surrounding hedges and brambles. We climbed through a broken window and made sure the camera was weighted corretcly on the steadicam. 

Our key footage here involved:
- A steady shot of two arm chairs
- A tracking shot up the stairs and panning round the hallway
- A tracking shot along the bed and looking out the window
- Several other steadicam shots of the bedrooms and corridoors


We aim to use this footage in our pre-music visual and I came up with an idea to overlay screaming sounds and snippets of arguments in post-production to represent that this was the boy's previous home, however now he lives out on the streets, a broken child cast away from society.

After the shoot at the house, we travelled back to Henry's home in order to gather all the equipment, props and costume that we would need for our shoot at our main location with the children. Here is a list we both created in order to check off what we had and find out what we needed:

EQUIPMENT
- Speakers to connect to the iPod to play the track
- Smoke machine
- Smoke machine fluid
- 2x extension cables
- Green screen
- Green screen frame and clips
- 3x lyrics printed out large and clear
- Track
- Dolly
- Steadicam
- Camera
- Battery and spare battery
- SD card emptied
- Tape
- Pens

FOR THE FIRE
- Wood
- Kindling
- Firelighters
- Coal
- Newspaper
- Matches
- Lighter

PROPS
- Skipping rope
- Football
- Tennis ball
- Toys
- Air streamer

Below is a photo of all the equipment we used.


After gathering all the equipment, we took it down in the car to our location and I set up before the children arrived on location, while Henry went to pick them up. I set up the green screen on the frame with clips, and weighted it down with wooden spokes, and afterwards set up the track and dolly with the tripod on top. I unloaded all the toys and set them up ready for the children to play with them. I then set up the extension cables and plugged the smoke machine and speakers in. I loaded the smoke fluid into the machine ready for filming. I made sure I had the track sped up double time on my iPhone to play through the speakers.

When the children arrived on location, we were ready to film more or less straight away. My role during this shoot was to make sure I kept all the children energised, happy and engaged whilst using the smoke machine to create atmosphere. I lit the fire and we were reayd to shoot.

The first shot we filmed was 1 minute of Seth sitting in front of the green screen.

After several attempts of the tracking back from the boy shot with the children playing in the background (5 to be exact), we both shot some steadicam CU shots of the boys and girls playing happily with the toys in the background and running around. We managed to use some nearby crates to film some high angled shots too. Other CU shots were filmed of Seth screaming, and slow pans across his eyes revealed the small drawings featured under both eyes.
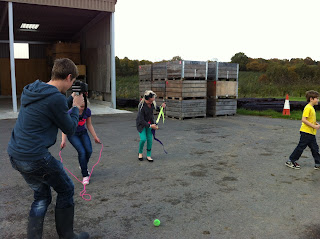
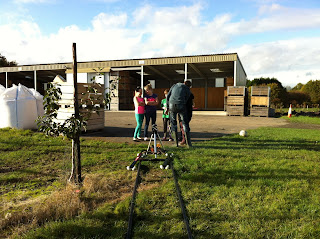

After this, I took charge of the camera to shoot the photos we would need for the digipak. Bearing in mind the fact that an album cover is square, I took one main photo for the front cover which is the boy Seth looking directly into the camera with a diagetic gaze while the children are playing in the background. I then took another photo for the back cover which is from behind Seth, so that he is centrally framed with the surrounding orchards in the background. This was an idea I was pleased to have created because I believe it is clever how the front cover is shot from the front and the back cover shot from behind at the back.

The final footage that we needed was a shot where all the children were out of shot and the fire had been put out with the smoke billowing for the ashes and shots of Seth moving his head violently. My role for this take was to set up the tripod on the track as it was at the end of the track back, and film while Henry put the fire out. I was very pleased with this shot as we could cut to it on the last beat of the song and the fire and all the children would have disappeared.


For the 'devil-like' shots, I asked Seth to violently shake his head as if he looked posessed and I filmed at various different distances on the track.

This was the last shot we needed and then our second film shoot was complete. All our filming had now been finished.

Group: Concept Development

One of our main targets was to find 1 main actor and 4 extras that are young children. We have accomplished this task and now have 5 young actors that are willing to take part in our music video. We have briefed all 5 children on what they are to do while filming such as telling Seth (our lead) that he needs to lip sync the lyrics to the track double speed.

We have finished our story board with all the frames that we aim to shoot drawn out with side technical notes. We have compiled these frames into an animatic on Premiere so that we can see which shots come up at which times of the track.

We have also hired out all the equipment we need for our two shoots: green screen, track, dolly, tripod and steadicam.

Friday, 2 November 2012

HCT: Aspect Ratio

For our video we would like to portray a cinematic feel. Therefore we will be using a standard anamorphic cinema aspect ratio of 2.39:1. The frame size is show below in the orange.